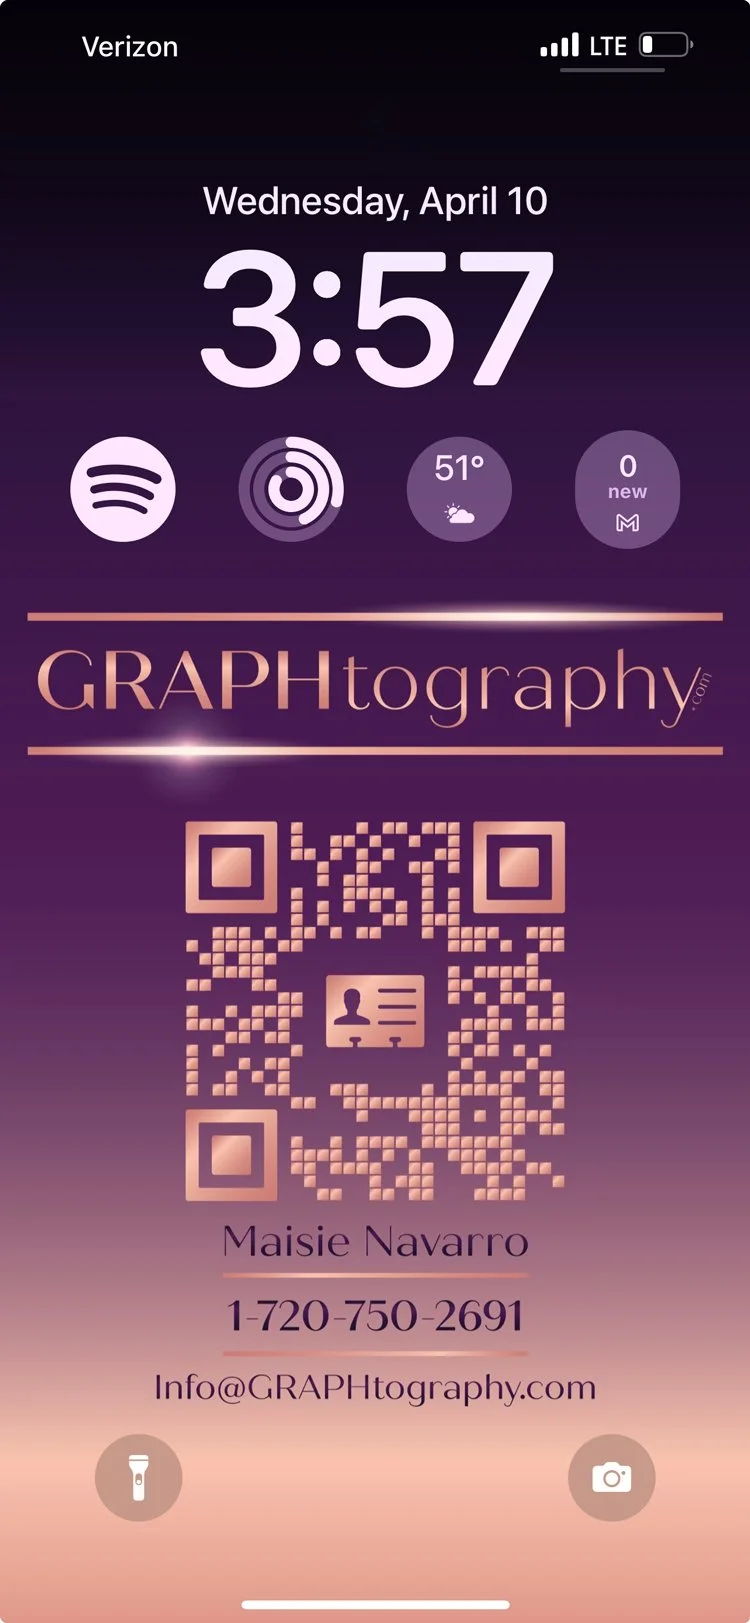
How To Add A Digital Business Card To Apple Lock Screen?
We design digital business cards with your logo and brand colors. In addition to a custom qr code, we include your name, phone number, and email address.
Utilizing a Digital Business Card is not just eco-friendly but also streamlines the rapid and efficient sharing of information, eliminating the need for physical cards. Stay seamlessly connected in our digital era!
Here are the instructions for Adding Your Digital Business Card to your Apple iPhone Lock Screen:
1. Download and Save: Before you begin, make sure you have downloaded and saved your Digital Business Card to your iPhone's Photos App. For easier access, tap the heart on the image to save it to your favorites.
2. Open the Photos App: Unlock your iPhone and find the "Photos" app, which typically has a multicolored flower icon. Tap to open it.
3. Locate Your Digital Business Card Image: Browse your Photos library to find the image containing your Digital Business Card.
4. Set Your Wallpaper: When you've opened the image, look for an up-arrow icon with a frame surrounding it, typically located at the bottom left or bottom right corner of the screen. Tap on this icon.
5. Use As Wallpaper: After tapping the up arrow, you'll see several options. Scroll down and select "Use As Wallpaper.
6. Adjust the Image: You will be presented with a preview of your image as a wallpaper. You can use two fingers to adjust the positioning and size of the image to your liking. Make sure the Digital Business Card and QR Code is visible and not obstructed by other elements.
7. Set as Wallpaper: After adjusting the image, tap the "Add" button at the top right of the screen.
8. Choose Set as Wallpaper: You'll have options to set the wallpaper for "Set as Wallpaper Pair” (both the lock screen and home screen), or "Customize Home Screen" to adjust additional settings. Since you want to use it as a digital business card from your lock screen, select "Set as Wallpaper Pair" (Note: Overtime, OS Updates may change these options, just follow the current options on your screen).
9. Confirmation: After you set it, your screen will go back into your photos. To confirm that is it ready to use, lock your phone and then tap the power button to view your lock screen. You Digital Business Card should be visible to the way you adjusted the image. If it is not, repeat the steps above.
10. Ready to Share: Your new Digital Business Card is now set as your lock screen wallpaper. When your iPhone is locked, others can easily scan it using their camera to access your contact information. This method provides a quick and easy way to share your contact information with others without the need for physical business cards.
If you find that there are clearance issues with your digital business card or it's not displaying correctly on your watch face, you can take a screenshot of your screen showing the clearance issues and send it to us for adjustments. We can then make the necessary modifications based on the screenshot you send us. Our email is Info@GRAPHtography.com
Tip: After you create a custom Lock Screen, you can make changes to it, like the font or color of the time and widgets:
1. Touch and hold the Lock Screen until Customize appears at the bottom of the screen.
If the “Customize” option doesn’t appear, touch and hold the Lock Screen again, then enter your passcode.
2. Swipe to the screen you want to change, tap Customize, then tap Lock Screen.
3. Tap the time to change the font, color, and style.
4. To add widgets that include information such as today’s headlines, the weather, and calendar events, tap Add Widgets, the date, or the field below the time. (See Add, edit, and remove widgets on iPhone.)
5. Tap Add or Done, then tap Set as Wallpaper Pair or Customize Home Screen.
Want to Learn How to Add a Digital Business Card to Apple Watch? - - Read Instructions Here


